

Rake and Splay - The Design (Part 2)
“How Important Are They?”

“What separates an expert from a beginner? The expert understands the science, the reason, and the why behind the concept and knows what to follow and what to toss out the window.” - Jedidiah Barnsworth
So here we are. After reading Part 1, we understand how we use rake, splay, and leg placement to help our sitters feel comfortable in our chairs. How do we incorporate this into our design phase?
Trust your eyeballs. Seriously though. And yes, this is where it turns subjective and people might not like it but that’s with all art.
Where do you start?
Copy other people’s work. Look at their plans. Chris Schwarz, Curtis Buchanan, and other chairmakers offer plans. The cost is an investment to see what works for these accomplished chairmakers and then you can start to adapt them as you see fit.
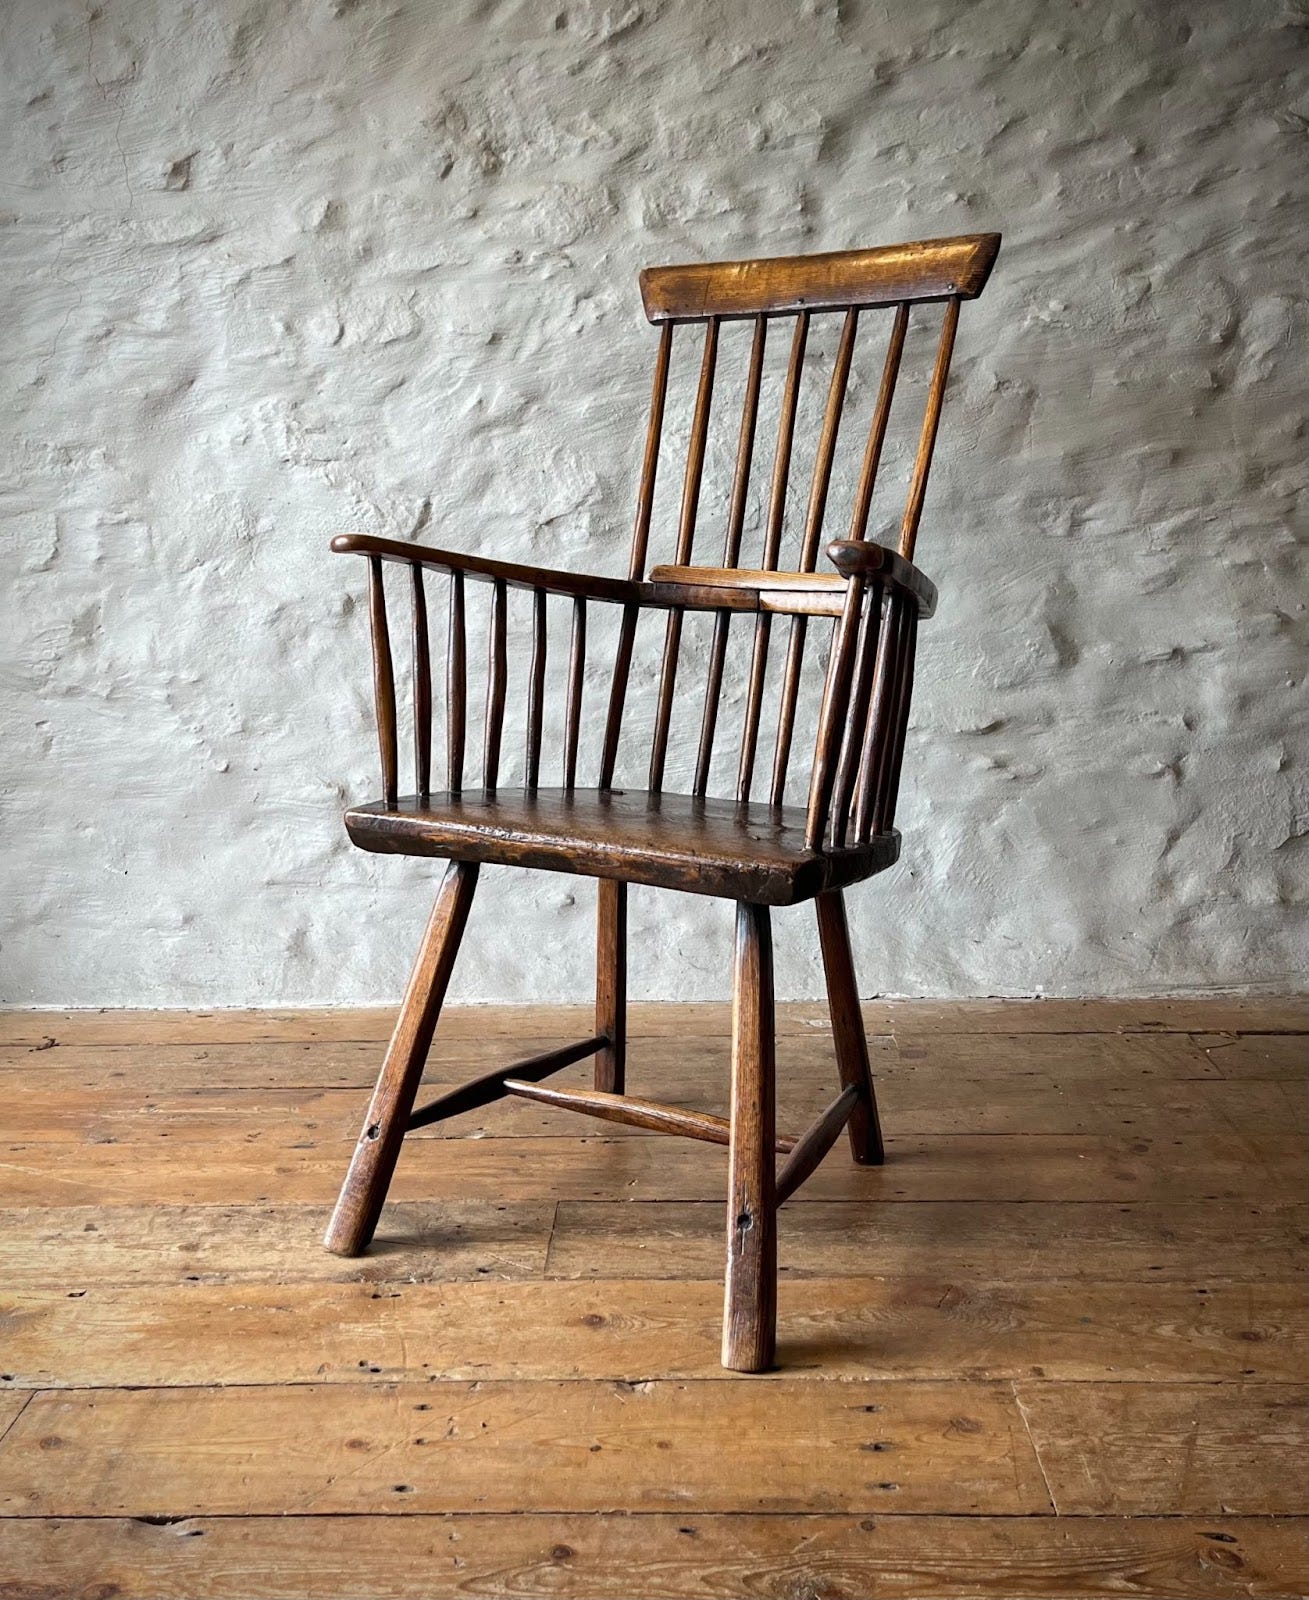
I’ve noticed that with my comb-stick chairs, my front legs are 2 - 2 ½ inches from the sides and front. With the Irish influenced chair that I built, it was 3 inches. The rear legs are typically 3 - 4 inches from the edge of the seat with the closest that I’ve done is 2 ¼ inches and are 10 - 11 inches apart, depending on the width of the chair (all measured from the underside of the chair). I have no shame in saying that these numbers were copied and then tweaked from other’s plans.
Collect pictures, mark up books, and take notes of things that you would like to use as a reference for future chairs. Especially when it comes to the rake, splay, and leg placement. There are so many examples of different varieties and you start to realize that there isn’t a “norm”. It really depends on what you like and the look you’re going for.
Sketch. Either on paper or using CAD. Draw multiple options. And then let it sit for some time. After staring at my CAD design for a couple of days I might make some changes or go with it. If you’re not good at sketching, make models instead. They can be as simple as a piece of scrap plywood and some coat hanger wires. The hardest part for me with models was getting my proportions correct.
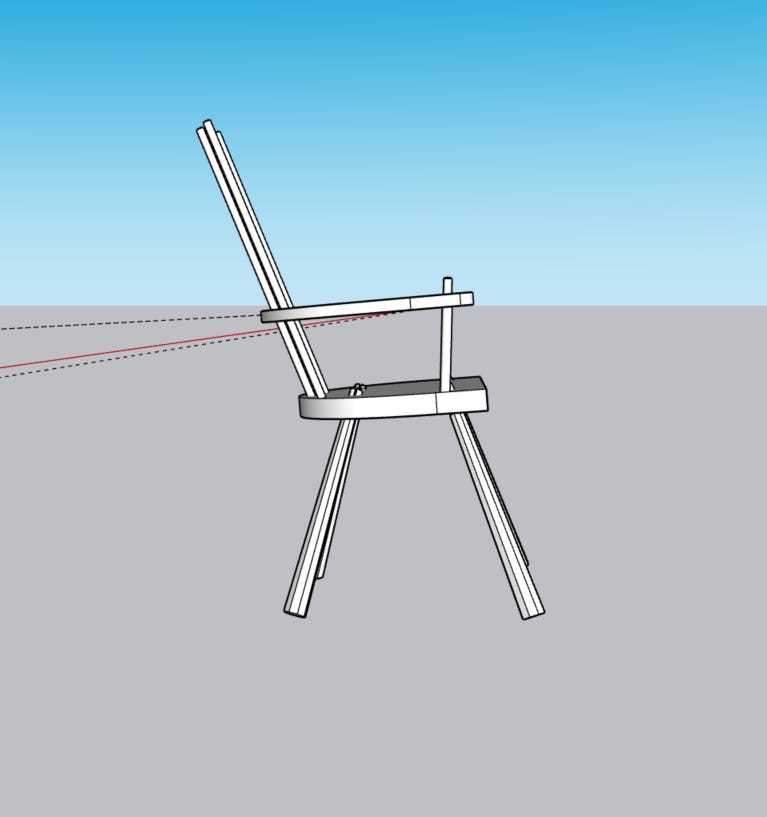
The stance of the chair. Think of the chair as a whole and not just the parts. This is why I turned to CAD software. It was an easier way to make sure that the sketch was proportional and that the angles were true. I don’t design the whole chair, just enough to get a good picture. I start with the legs and seat, then add a few long sticks, and then a couple of short sticks. It’s also easier for me to manipulate the numbers if needed.
After looking at the above CAD design, I decided that the front legs have a little too much rake and the rear ones need a little more. Not that I need to stick to the drawing perfectly, but I’m letting you as a reader know what I’m thinking. The stance changed a little when I tilted the legs and seat back a few degrees to represent the backwards slant that I wanted the seat to have.
Along with this thought, pay attention to the relationship between the rake of the rear legs and the amount of tilt on the seat and decide if it’s appropriate with the design of the chair. A dinner/desk chair wouldn’t typically have as much rake for the rear legs as a chair made for relaxing. Having a shallow(er) seat angle but a big rear leg rake angle would cause them to be long. And the other way around. If I have a steeper angle for the seat to allow the user to lean back and relax, my rear legs would probably be raked a little more to provide support past the edge of the seat.
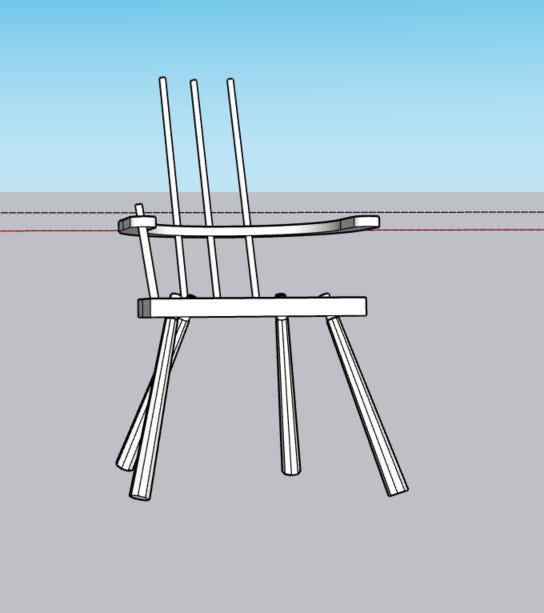
Aligning the front and rear legs. It takes playing with the numbers but it can be done. It’s absolutely not necessary but it can give the chair a certain look. Being aware of the possibility and deciding that it’s not important to you is better than not knowing. I’ve included some SketchUps to illustrate the point. A couple of my chairs have that kind of look but there are others that don't.
The following pictures show the legs on the right being aligned and the look that it can give you.


Applying this knowledge to other chairs and stools:
Some designs like traditional post and rung (ladder back) chairs, can be very straight chairs with minimum rake and splay. Their popularity has demonstrated that they’re safe to sit in but personally, I’m drawn to the more contemporary ones that have more rake and splay that many chairmakers incorporate now. Andy Glenn has written a book on Appalachian chairmakers and is a great resource for that style.
Minewax has a simple step stool design that I have my students make BUT the legs don’t have any splay so I caution the students when they take them home to be careful, especially if they have younger/little siblings in the house. If someone puts their weight on the edge of the stool, past the legs, it might cause the stool to flip. I’ve seen other designs that incorporate an angle to create splay and make it sturdier.
The finale. So here we are at the end of Part 2. I hope that it’s given you some information to digest and some resources for you to teach or share with others. The bottom line is that for centuries chairmakers have both used and ignored the principles of rake and splay. Not that we need to do shoddy work and pass it off as “rustic” and “antique” but sometimes we put undue pressure on ourselves for making “the perfect” chair. There’s a range of “perfectly fine” that we can use.
I’ll be honest with you, I had to torch chair #4 ½ and it was mostly because of the horrible stance that it had (others tried to tell me that it was okay but I didn’t like it). I tried to keep the splay angle tight in the front legs but it was too steep and it didn’t work out like I had envisioned. Then I broke an arm trying too hard to get it where I wanted it. It was a good excuse to cleanse myself and start afresh.
When we teach these concepts to our students, let’s make sure they understand the principles of rake, splay, and leg placement and the range of angles and measurements they can use to make amazing pieces.
**Side note: Feel free to use any part of Parts 1 and 2 to help teach others. And if I’ve made any mistakes or need to further explain something, let me know.